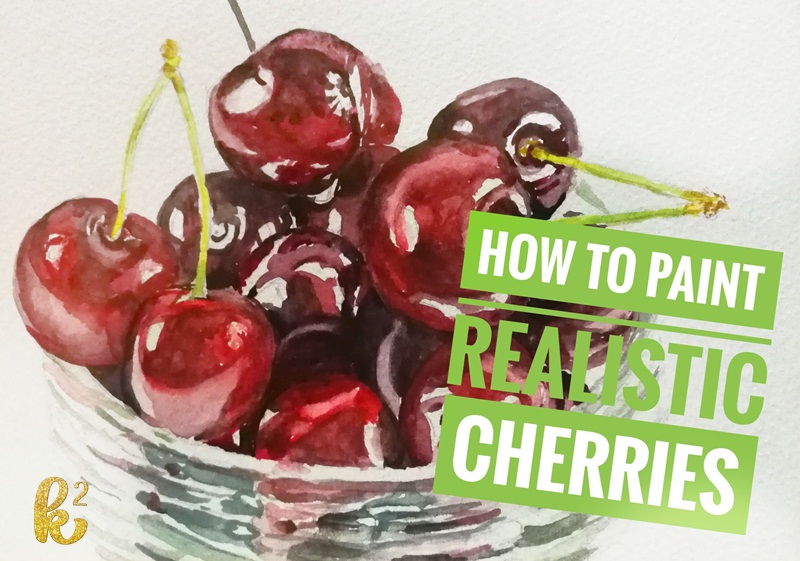
I finally got around into writing another art tutorial. It is almost the end of July and it is World Watercolor Month. For this month, I challenged myself to not paint flowers so this tutorial is about painting cherries. The reference photo for this painting is from Pexels.
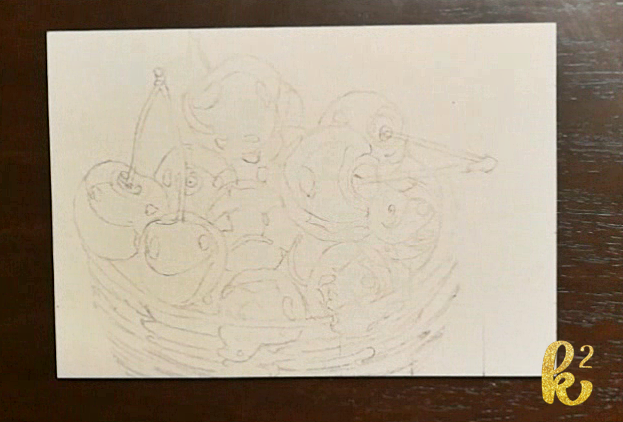
I always start with a drawing and I marked all the areas where I put my highlights and shadows.
I used Raphael kolinsky round brushes (size 2 and 4) and I used Daler-Rowney watercolors. For this painting, I used alizarin crimson, cadmium red, prussian blue, chinese white, viridian and yellow ochre.
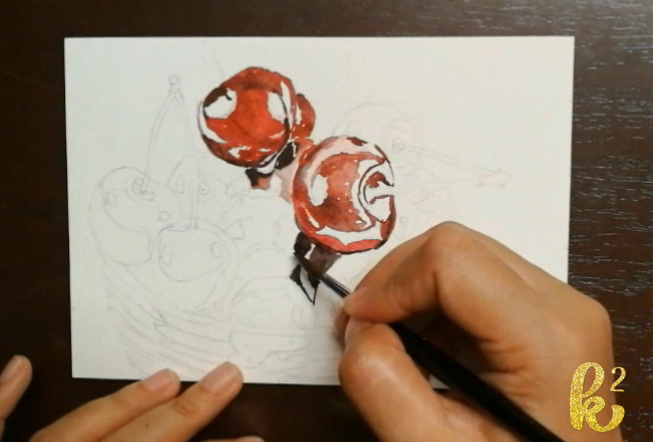
To get the colors I wanted that are close to the dark red plump cherries. I play with these three colors: alizarin crimson, cadmium red, prussian blue. I mix alizarin crimson with prussian blue when painting the areas and the shadows. I used the individual colors to match the different tones in the cherry.
Whenever I start painting, I always have this fear that I would be wasting my time trying to paint and end up with unsatisfactory painting. I like to scare myself that way. (Praning-praningan. hehehe) When I started, the first cherry did not look like a cherry at all. Honestly, I was not sure if I am going to successfully paint it but I continued painting. It took me almost two hours to complete the painting.
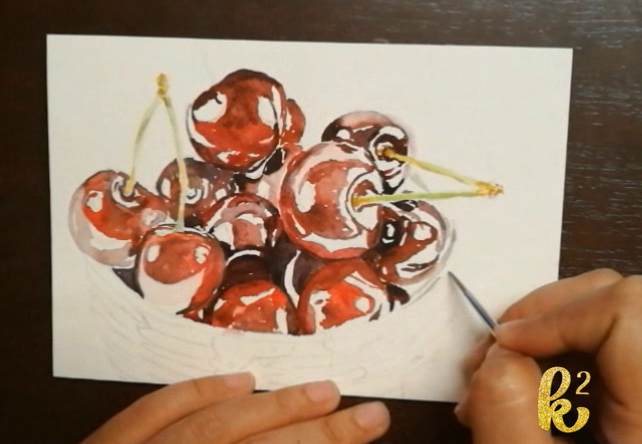
As you can see there were areas that I avoided painting, those are the areas for highlighting. Cherries have shiny skin. To show that shine, you need to leave areas unpainted because it is easier to add color to these areas later than to remove the pigment. For me, the markings on the drawing where to put the highlights and shadows are helpful in the painting process. I have not yet developed the skill of painting from memory. I still need planning on how to tackle a certain painting. I always look at the reference photo as a whole and try to understand where the light source is and how the light casts shadows on the surface. I also try to identify the different colors on the object so even if we see that the cherry is dark red, there are different shades of red you can see and these shades depend on how the light illuminates the surface. This is how I study the subject so that it would closely resemble the real thing.
In every painting I work on, I always have a tissue near my palette to easily blot the excess water on the brush. I also have another paper on the side where I test if I mixed the right color.
My usual painting technique when using watercolor is to apply my strokes using a dry and more saturated color on the dark areas and I gradually spread the color using a wet brush. I use this technique when my subject is either a flower, fruit or animal. It may look like I am very certain and precise about my strokes and colors. In reality, I am really looking at the reference photo every now and then and I paint the different shades on the different areas as I see fit.
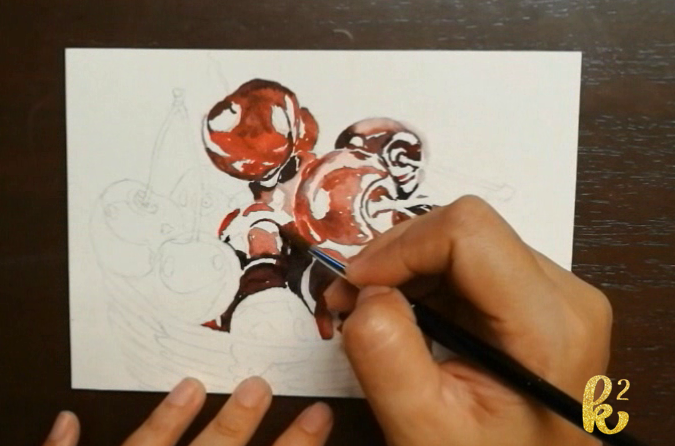
At this point, the painting is slowly taking shape. Attention to details is important in realistic paintings. Each little highlight and fine stroke contribute to the painting a whole. This is one of the benefits in learning how to paint; you tend to be very observant of your surroundings.
All these colors used in painting cherries are the different colors that are produced from mixing alizarin crimson, cadmium red and prussian blue. These are the specific pigments I used. You can also try different shades of red available in you palette. Try to experiment one bright red pigment, one medium red and one dark blue or any combination of red and blue. Cherries have stages of ripeness and different varieties so different combinations of reds and blues could still result to a realistic painting.
Painting a glass jar can look challenging. It is easier to paint it by studying the jar. Understand that this jar is a clear object. It does not have color. The reflection of the cherries on the surface tells us that this is a glass jar. Also try to observe the way the light hits the surface. For the rim and grooves on jar, I see shades of light gray to gray on the surface of the glass. I used the existing colors on my palette . I mixed everything which made the mixture close to black and when I mix black with white, I get grey. The different shades of gray is dependent on the amount of white mixed in. In that way, I did not have use tube of black paint. I get save on paint by the the colors I already have in my palette.
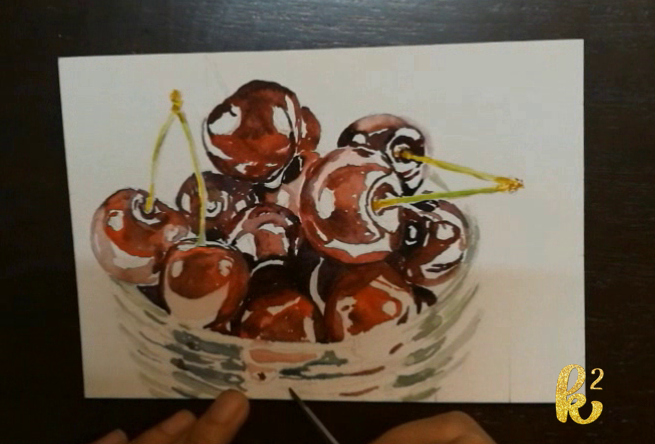
In painting a jar, you do not have to paint the entire shape. You just paint the reflection and shadows and when finished, you can already see the shape of the container. When looking at the reference photo, I really try to identify the very dark areas and try to replicate it in the painting. The contrast between light and dark adds depth and makes the painting look real.
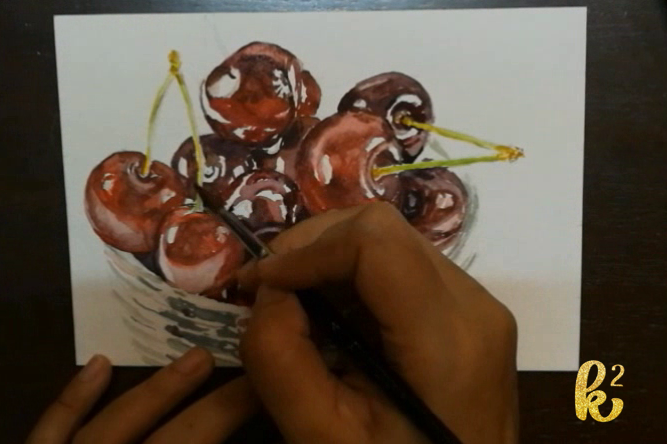
For the finishing touches, I went over the painting and started blending the colors until I was satisfied with the outcome.
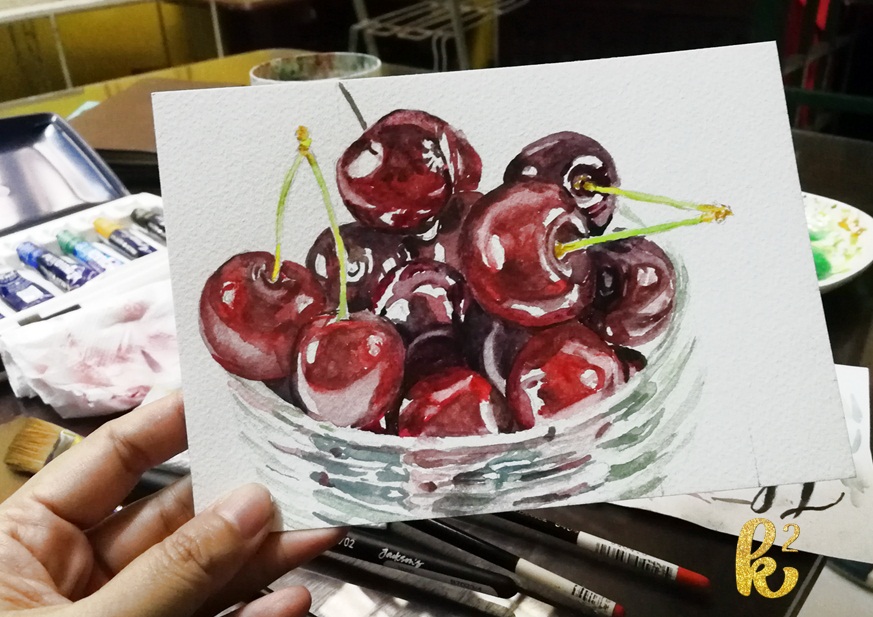
This is the completed painting.
This is the Youtube video of the process.
Until the next tutorial!
That is a really beautiful paint. I prefer to have a natural picture of a fruit or landscape to add a pop of color.
I wonder how it is possible to paint such realistic pictures! I’ll try to follow your trips and see the outcomes. I love the cherries and the colours! It’s really beautiful! 🙂
These look so awesome. I have enjoyed a couple of paint nites with girlfriends. It’s great when it comes out looking nice.
You have so much talent! I would love to learn to paint in watercolors!
Great work! This is really amazing and great work. I am not really gifted in terms of art so, I am really fascinated by this. Looking forward to more of your work.
oh my gosh I wish I had even a fraction of your talent – hair painting is my thing – try to do it on a canvas & i’m awful!
Hi Kat, this is so nice! You made it look easy to paint in a realistic way. I wish I have the skills like you. I’m going to share this to my sister because she likes painting!
Oh wow! That’s amazing. I can’t paint or draw to save my life. I did a couple of those group painting activities with friends and it was not so successful….
Wow this is incredible- they really do look lifelike. I dont think I could ever make them look that good! Amazing!
I love this tutorial! I still am in the novice stages of watercolor painting and still learning the ropes but this tutorial will come in handy!