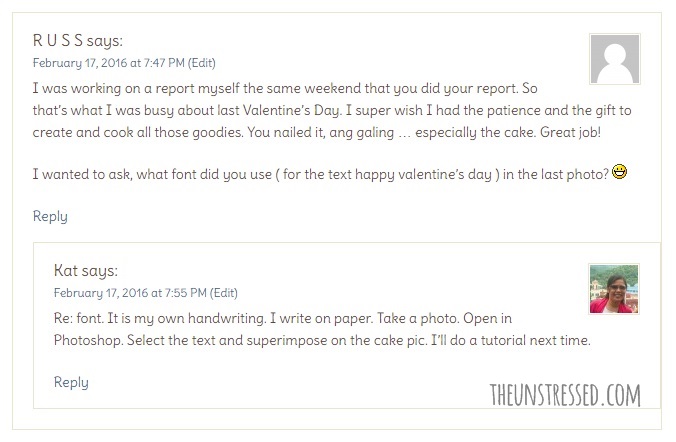
I posted this photo last February.

Russ asked this question:
This is now the tutorial I promised four months ago.
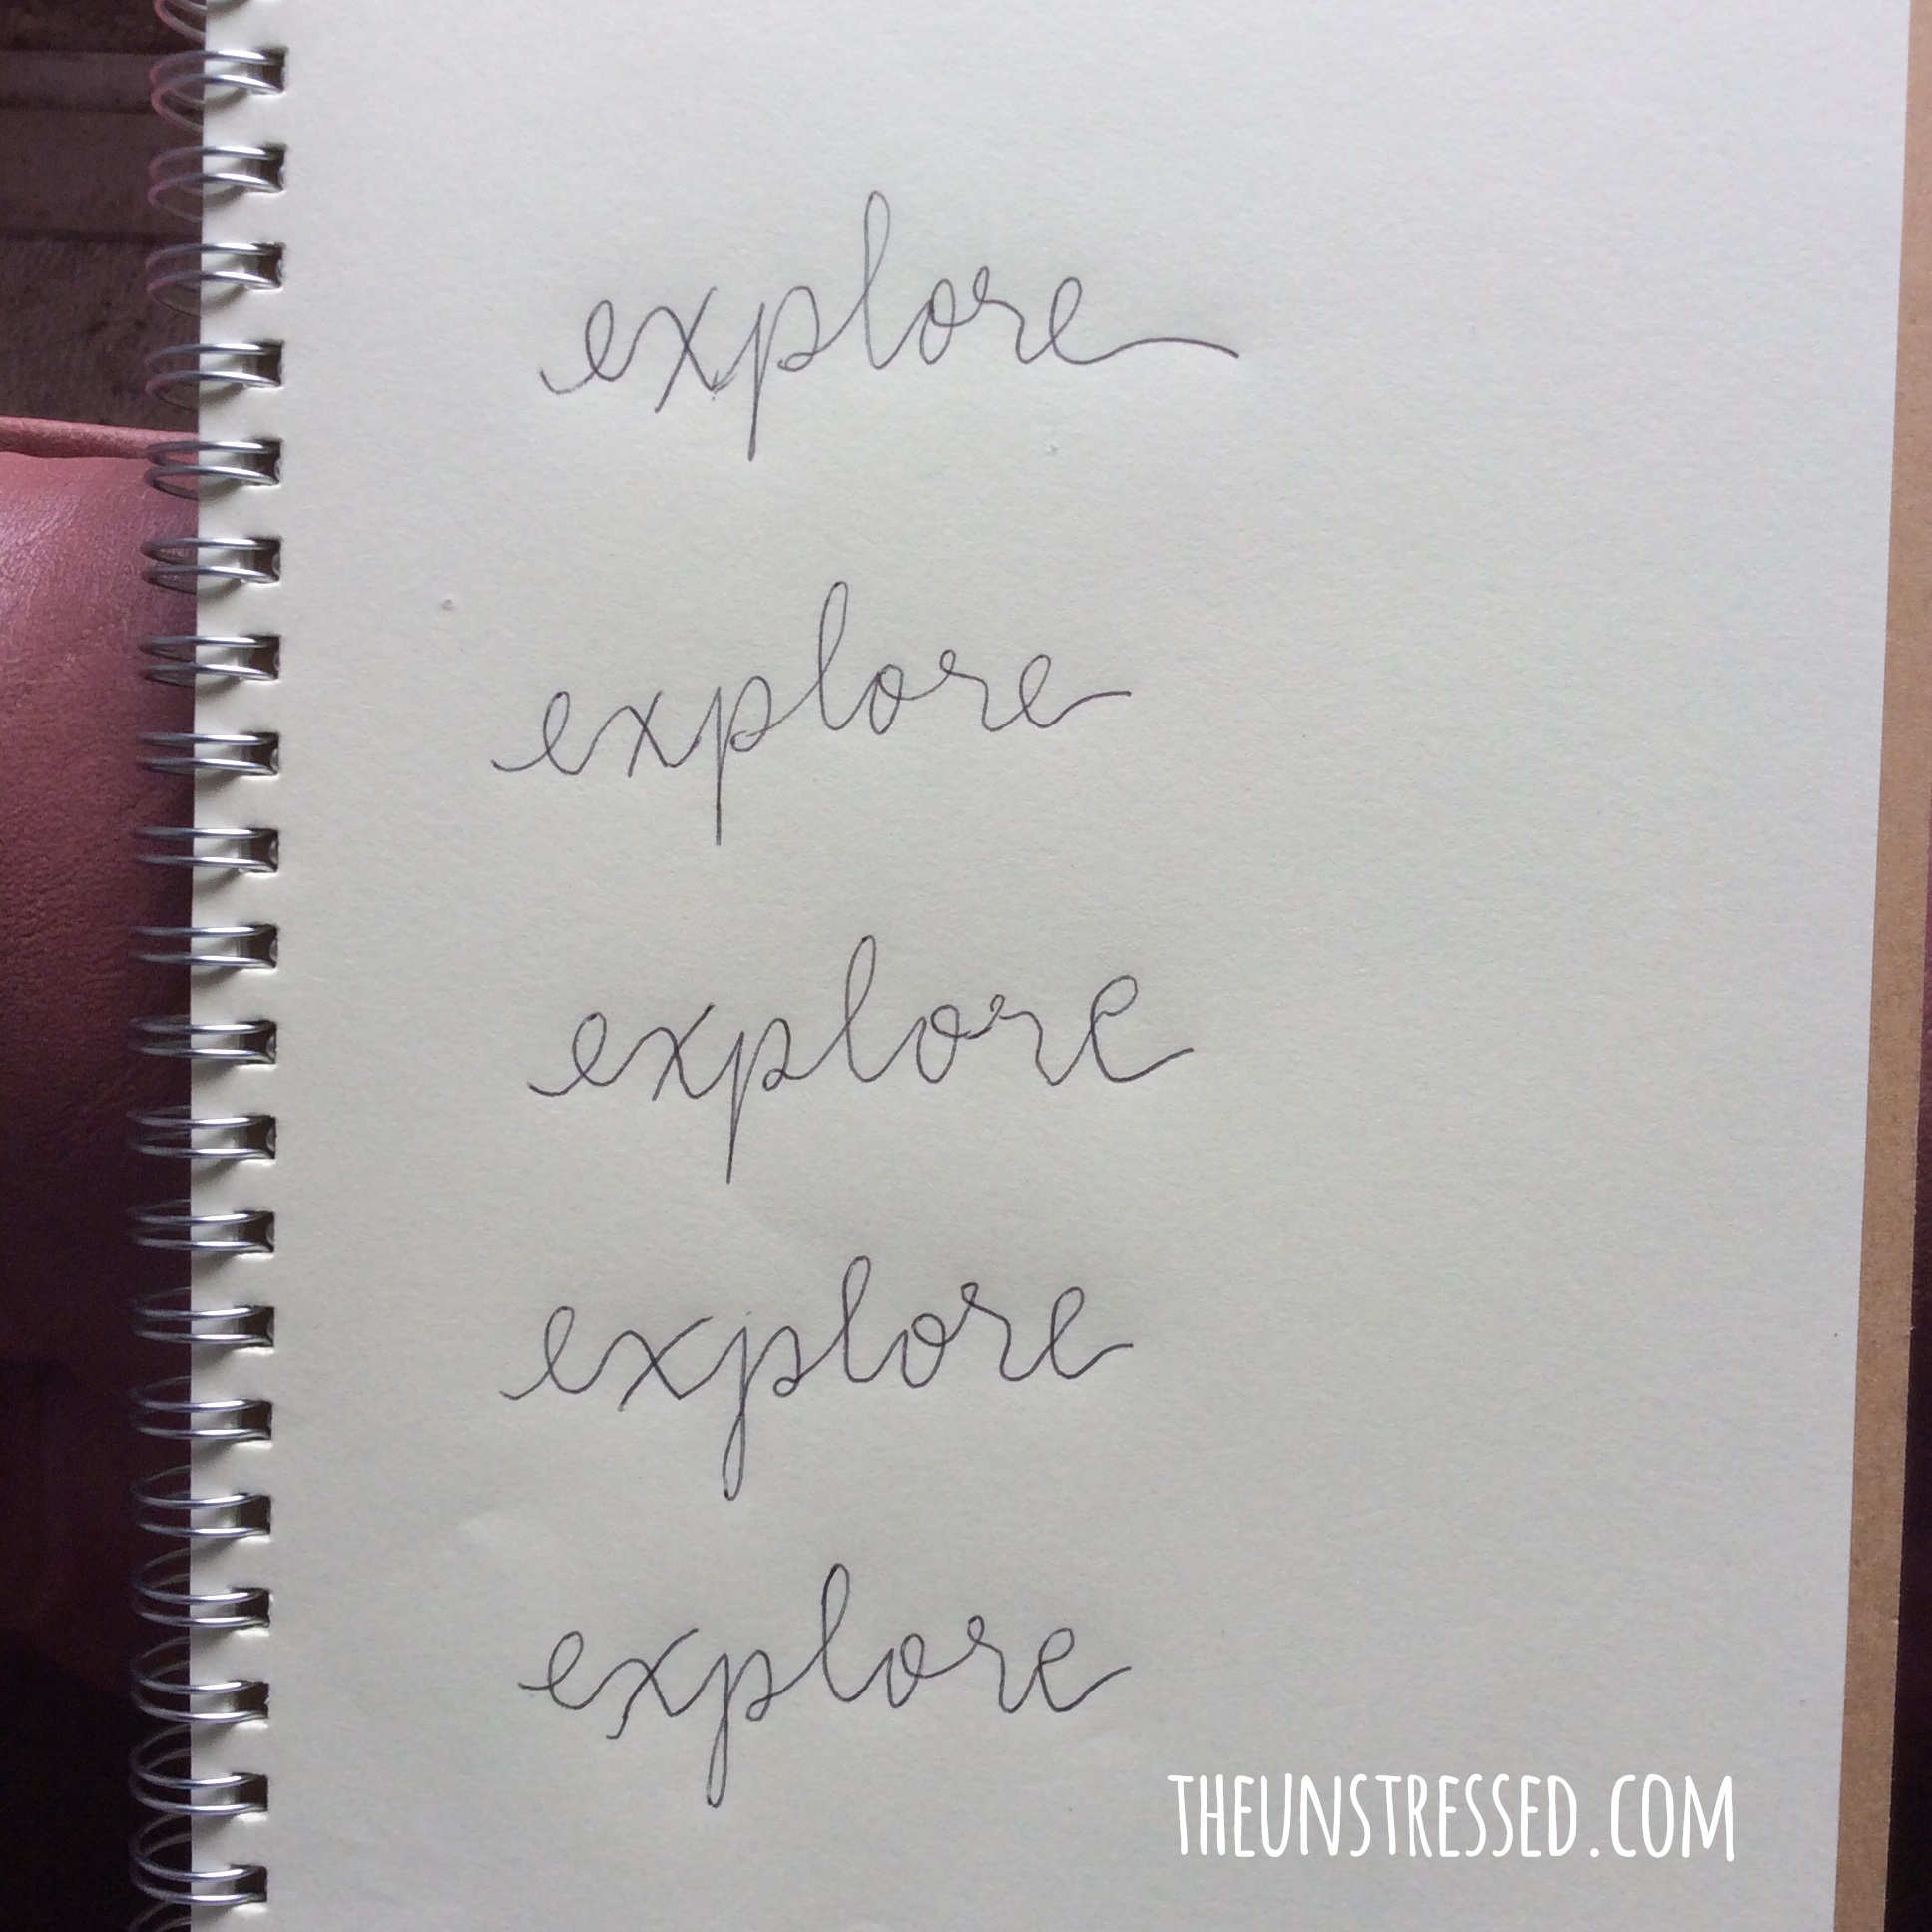
Let’s write the word “explore” in this photo which we shall refer to as a background photo.

Steps:
1. Write the word in paper. I would write different versions.
2. Take a photo of the written word. Tip: Find a well-lit area when taking the photo. Avoid shadows.
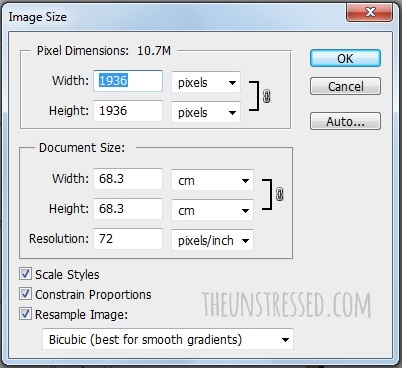
3. Open the file in Photoshop. Check image size. Click on Image>Image Size. Take note of the width, height and resolution.
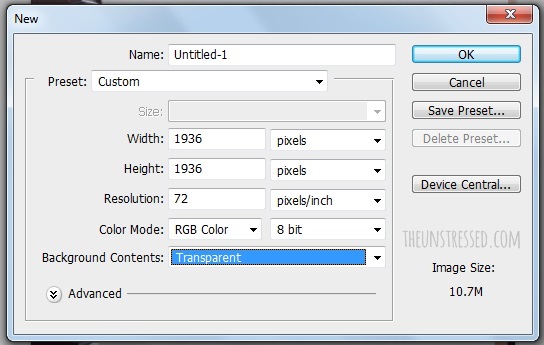
4. Create a new file. Click on File> New. Set width, height and resolution the same as the image size of the photo. Make the background contents as transparent.
5. Choose which handwritten word you want to use. Cut and paste into the new file.
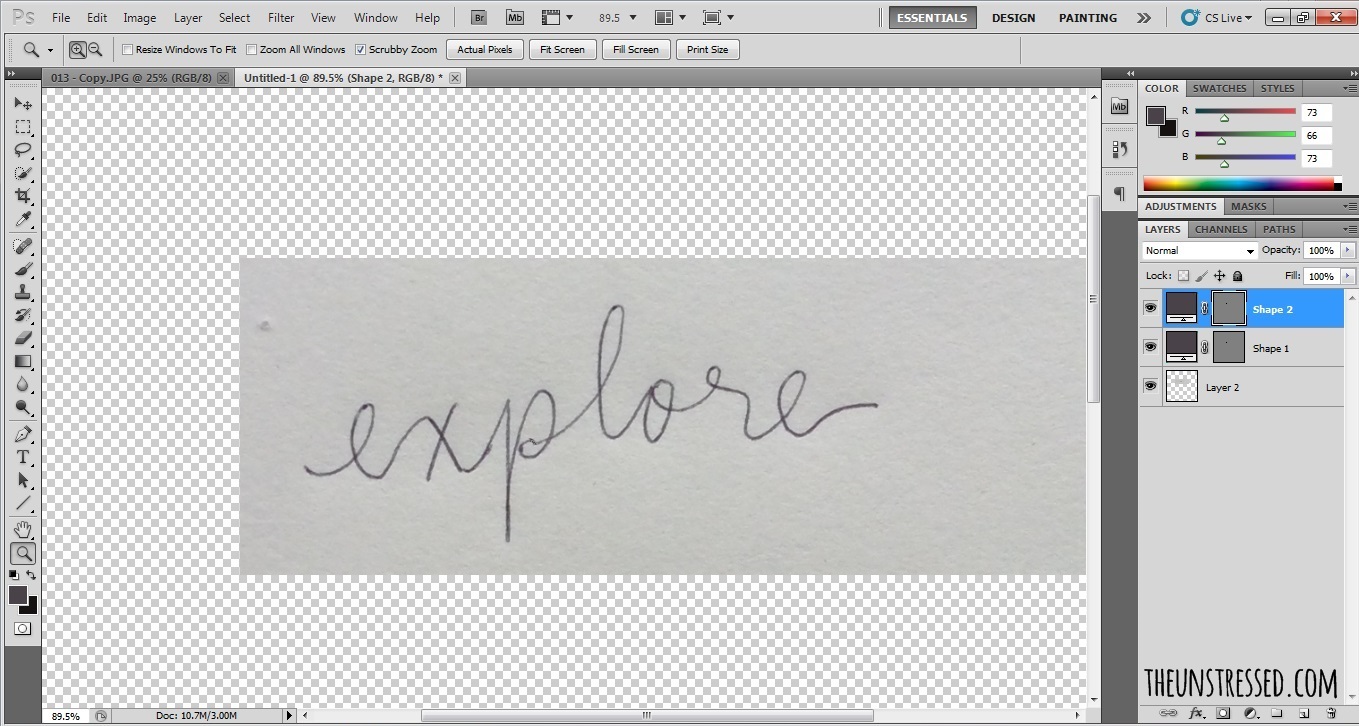
6. Make the stroke more prominent by adjusting threshold level. Click on Image>Adjustment>Threshold. Set threshold to 171.
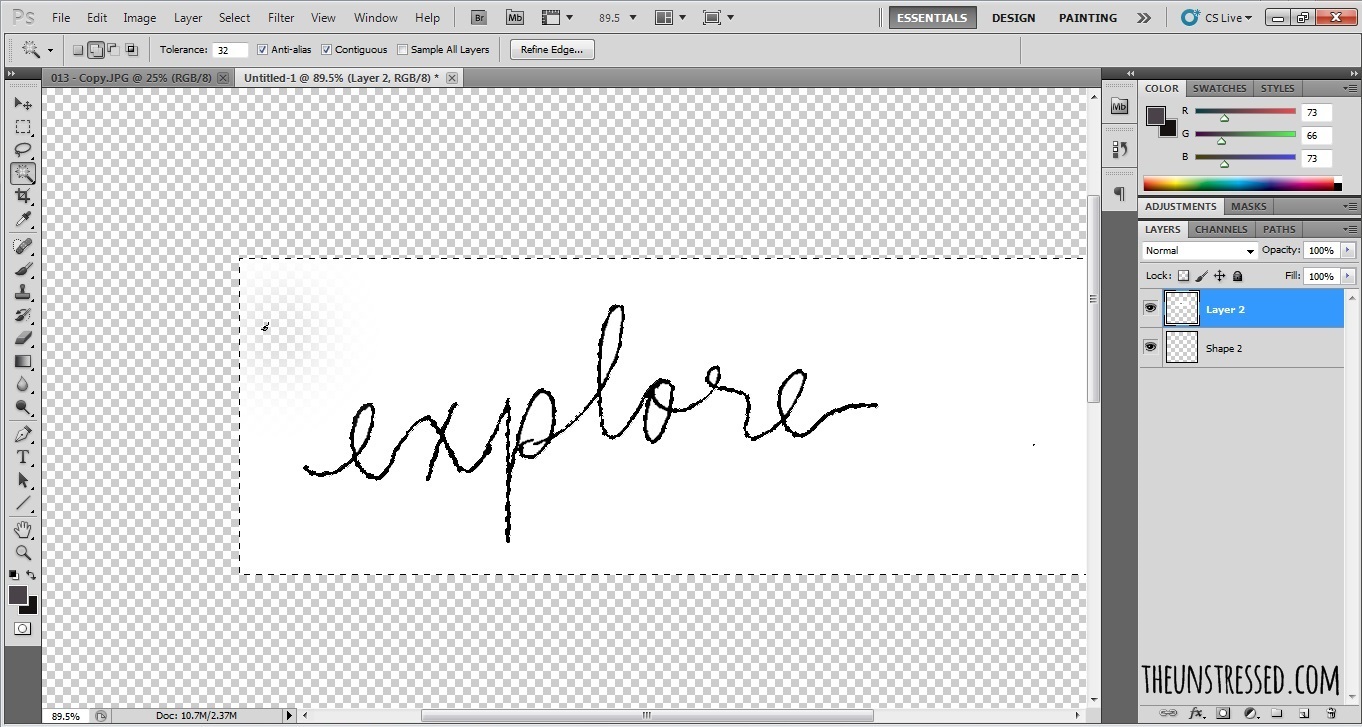
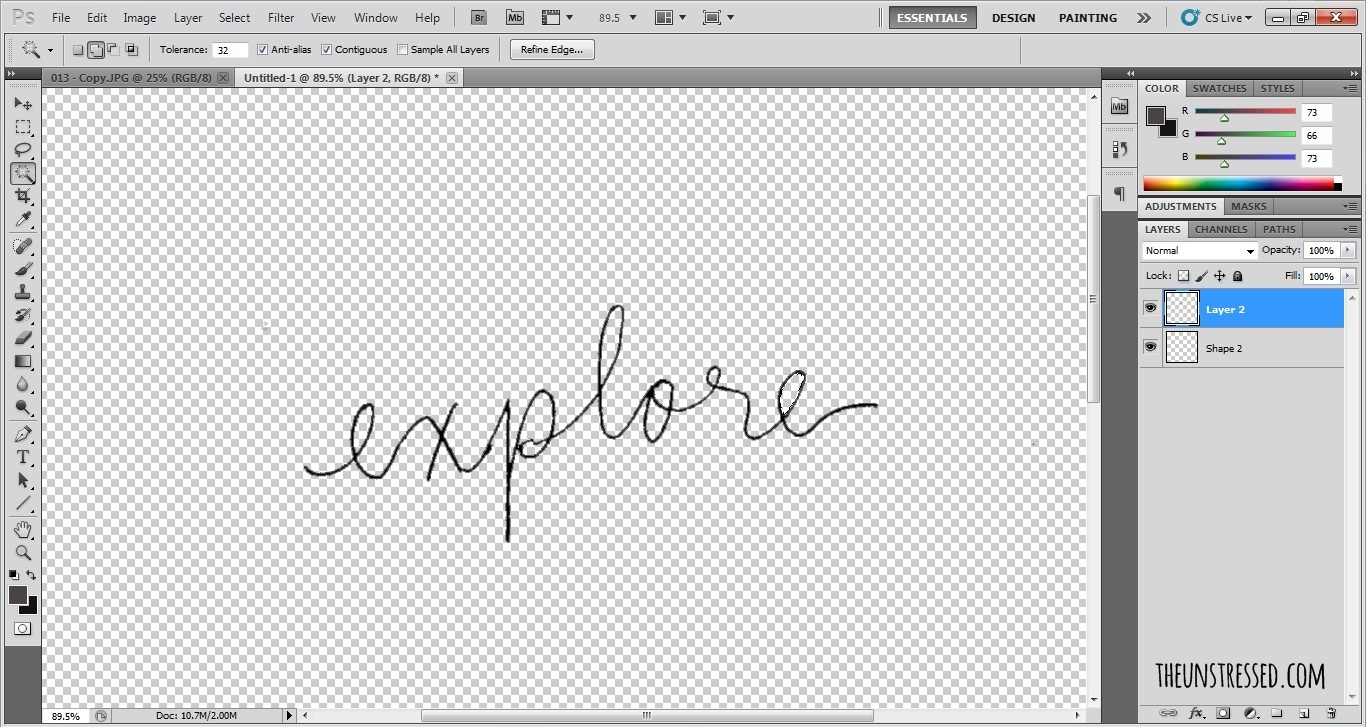
7. Delete the white background. Click on the Magic Wand Tool. Click on the white area and press Delete on the keyboard. Repeat the procedure in the remaining white areas. You are left with this:
8. Select the word, copy and paste into the background photo.

9. To change the text to white, click on Image> Adjustment> Invert. I moved the text to make it more visible.

I hope my instructions were clear. Comment or email if there are questions. Hope this helps you personalize your images with your own handwriting.
Very nice tutorial. You have a nice handwriting too. Mine is not nice. hehe..
http://www.hintofglitter.com
My Ex-CEO as a farewell gift, gave us all this group photograph framed with a msg in his own handwriting. We were all so impressed! Now I know!
Such a detailed post.. seems easy to do.
This is a timely post! I was just thinking about adding a signature to my photos. I don’t have photoshop, though. Is there another program I can use that’s free or online? Thanks!
Pal Raine said she uses PicMonkey. You can also use YouDoodle. (I just think these are not as versatile as Photoshop.)
What version of Photoshop are you using sis? I just only knew how to tweak CS3 and I actually accidentally deleted it on my pc and now I am Photoshop-less. Did you purchase your own? I want to learn that. Nice handwriting btw.
I have CS5.
Me too, keep wondering these steps. Photoshop really helps a lot with this photo. Sometimes, it’s really great to study other techniques with photos.
Awesome! When you’re into designing, you definitely breathe photoshop.!
I dabble with Photoshop but I always thought there are new fonts coming out. This is awesome and will do this, too! Thanks for the tip!
Thank you for sharing the step by step. I think I can do this if only I have a good penmanship. hehehe!
Nice tutorial! I don’t really know how to use Photoshop though but my hubby does. Maybe I can ask him to teach me how to use it. This one’s really cool. 🙂
Great tutorial. I have done this many years ago when I was into photo editing. Adding your own handwriting to a photo makes the photo more personal and unique.
I have another way of doing it, using PICMONKEY app. , easy for me to add words in my photos and design it more.
Oh, I use YouDoodle on my ipad, too. I just think that writing using the pen is cleaner than using the forefinger to write on a device.
Awesome, I didn’t know it was that easy. Thanks for the lovely tutorial this is so useful especially when you’re a blogger. There’s so much you can do, from watermarks to banners!
This is a new trick for me. I don’t have a good penmanship though but I guess the process is simpler than I first thought of.
This is a wonderful post. I really like the way it is being explained step by step. Thanks for sharing
I would not have figured this out myself. Thank you. There are really some photographs that would look good with a handwritten message.
Photoshop is such an amazing software. I do try to play with it whenever get some time.
I actually do this. I edit my signature into my artworks and it actually works.
wow this is an easy tutorial! so helpful! thank you so much! Hope you could post more tutorials in using photoshop because I am a newbie when it comes to photoshop and I am really struggling haha
http://www.retlync.wordpress.com
You’re welcome! I will post more.
I did that before too! But make sure the pen is thick enough so that you can do the cropping! Too thin it won’t be able to be spot by photoshop!
Adjusting threshold does the trick sometimes.
I love to do this to my travel photos, as a memory to remind me of the little corner of the world that I visited. Or sometimes I created some cards using old photos for my friends birthdays.
Sweet friend. It adds some personal touch to a photo.
wow! Niceee!!! ♥ Thanks for the tutorial, I’m bookmarking it, I might use this in the future! hehe.
Wow! I admire your penmanship because mine sucks lols. Will definitely do this trick in my future posts. Thanks for sharing!
I saw that some calligraphers do not necessarily have the nicest penmanship. It is through constant exercise that they develop the skills.
I love your tutorial, very helpful, easy to follow and informative. Your handwritten is the BEST! I love it talaga…:)
http://www.wish4less.info
This is a nice tutorial! I’ve always wanted to know how to do that!
Thanks for sharing, kung maganda lang handwritten ko why not to exposed 😉